
| Version 37 (modified by jazz, 18 years ago) (diff) |
|---|
Massive Deployment of Xen enabled Virtual Cluster using Diskless Remote Boot Linux
Test Environment
- VMWare Server 1.0.3
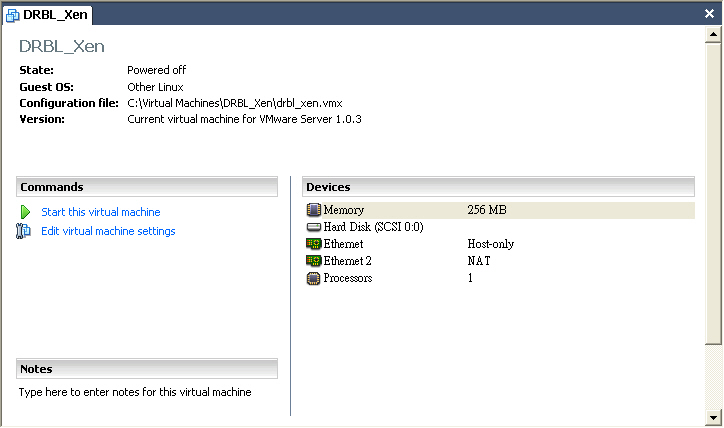
- VMWare Image debian 4.0r1 as DRBL Server
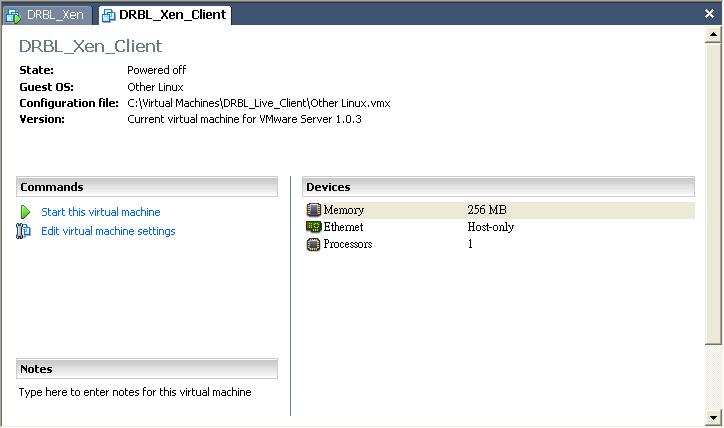
- VMWare Image without disk as DRBL Client


Pre-installation
- First, install Xen Hypervisor and Xen enabled Linux Kernel and then reboot
root@drbl-xen-srv:~# uname -a
root@drbl-xen-srv:~# mv /lib/tls /lib/tls.disabled
root@drbl-xen-srv:~# echo "loop max_loop=255" >> /etc/modules
Linux drbl-xen-srv 2.6.18-6-686 #1 SMP Sat May 24 10:24:42 UTC 2008 i686 GNU/Linux
root@drbl-xen-srv:~# apt-get install xen-hypervisor-3.0.3-1-i386-pae linux-image-2.6.18-6-xen-vserver-686 xen-tools libc6-xen bridge-utils
root@drbl-xen-srv:~# update-grub
root@drbl-xen-srv:~# reboot
- Note1: If you did not install libc6-xen, "4gb seg fixup" error message will keep showing up while booting.

- Note2: amd64 architecture does not have libc6-xen package (i386 only)
- Note3: disable tls for libc6-xen
root@drbl-xeb-srv:/lib# dpkg -S /lib/tls
libc6-xen, libc6: /lib/tls
- Note4: Xen will use loop device for creating new DormU machine, so we load loop kernel module while booting.
- Choose Xen to boot at GRUB menu


Install and Configure DRBL
- Download GPG-KEY-DRBL and add GPG key via apt-key
root@drbl-xen-srv:~# wget http://drbl.nchc.org.tw/GPG-KEY-DRBL
root@drbl-xen-srv:~# apt-key add GPG-KEY-DRBL
- Add DRBL repository URL to /etc/apt/sources.list.d/ then install drbl package
root@drbl-xen-srv:~# echo "deb http://free.nchc.org.tw/drbl-core drbl stable" > /etc/apt/sources.list.d/drbl-sources.list
root@drbl-xen-srv:~# apt-get update
root@drbl-xen-srv:~# apt-get install drbl
- Use drblsrv command to setup DRBL server. Here we choose linux-image-2.6.18-6-486 as default DRBL PXE kernel image
root@drbl-xen-srv:~# /opt/drbl/sbin/drblsrv -i
[....skip....]
Install kernel for clients... ...
In ayo repository, searching the latest kernel ...
*****************************************************.
Now run: /opt/drbl/sbin/drblsrv-offline -c -d -a -l en_US -k /var/cache/apt/archives/linux-image-2.6.18-6-486_2.6.18.dfsg.1-18etch5_i386.deb "" ""
Kernel package /var/cache/apt/archives/linux-image-2.6.18-6-486_2.6.18.dfsg.1-18etch5_i386.deb is used for client...
*****************************************************.
[....skip....]
- Use drblpush command to deploy DRBL Client Image
root@drbl-xen-srv:~# /opt/drbl/sbin/drblpush -i
- Use Thin Client VMWare Image to test DRBL

Configure PXELinux for Xen Network Booting
- To load Xen-based kernels you have to use the SYSLINUX multiboot module mboot.c32. So we copy mboot.c32 and Xen hypervisor to TFTP root directory of DRBL.
root@drbl-xen-srv:~# dpkg -S mboot.c32
syslinux: /usr/lib/syslinux/mboot.c32
root@drbl-xen-srv:~# cp /usr/lib/syslinux/mboot.c32 /tftpboot/nbi_img/.
root@drbl-xen-srv:~# cp /boot/xen-3.0.3-1-i386-pae.gz /tftpboot/nbi_img/.
- Use drblsrv-offline command to generate initial ramdisk of xen-based kernel which is needed for PXE network booting. You should find initrd-pxe.2.6.18-6-xen-vserver-686.img and vmlinuz-2.6.18-6-xen-vserver-686 in /tftpboot/nbi_img/ folder.
root@drbl-xen-srv:~# /opt/drbl/sbin/drblsrv-offline -s `uname -r`
root@drbl-xen-srv:~# find /tftpboot/nbi_img/ -name "*-xen*"
/tftpboot/nbi_img/initrd-pxe.2.6.18-6-xen-vserver-686.img
/tftpboot/nbi_img/vmlinuz-2.6.18-6-xen-vserver-686
- Note: initrd-pxe.2.6.18-6-xen-vserver-686.img is different from /boot/initrd.img-2.6.18-6-xen-vserver-686. In initrd-pxe.2.6.18-6-xen-vserver-686.img, there are NFS mounting scripts which is needed for each DRBL client.
- Since Xen-based kernel can not boot with Xen hypervisor, we have to switch vmlinuz-pxe and initrd-pxe.img back to normal linux kernl.
root@drbl-xen-srv:~# /opt/drbl/sbin/drblsrv-offline -c -d -a -l en_US -k /var/cache/apt/archives/linux-image-2.6.18-6-486_2.6.18.dfsg.1-18etch5_i386.deb
- Note: You can simply remove and recreate the symbolic links named by vmlinuz-pxe and initrd-pxe.img in /tftpboot/nbi_img
root@drbl-xen-srv:~# cd /tftpboot/nbi_img
root@drbl-xen-srv:/tftpboot/nbi_img# rm initrd-pxe.img vmlinuz-pxe
root@drbl-xen-srv:/tftpboot/nbi_img# ln -s initrd-pxe.2.6.18-6-486.img initrd-pxe.img
root@drbl-xen-srv:/tftpboot/nbi_img# ln -s vmlinuz-2.6.18-6-486 vmlinuz-pxe
- Note: You can simply remove and recreate the symbolic links named by vmlinuz-pxe and initrd-pxe.img in /tftpboot/nbi_img
- Add a new Xen option to pxelinux.cfg
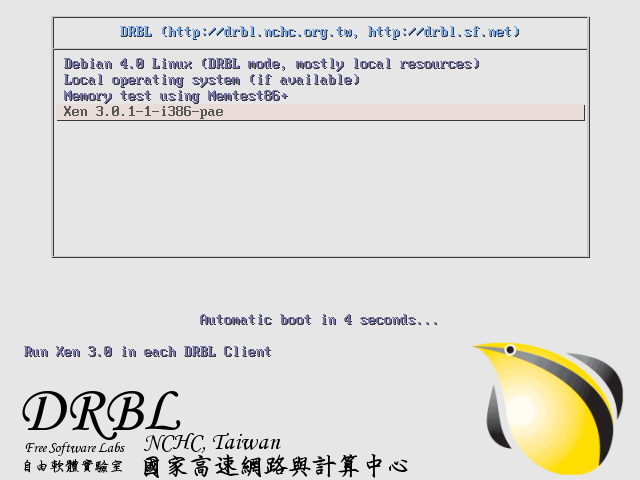
root@drbl-xen-srv:~# cat << EOF >> /tftpboot/nbi_img/pxelinux.cfg/default
> label xen cluster
>   MENU DEFAULT
>   # MENU HIDE
>   MENU LABEL Xen 3.0.1-1-i386-pae
>   # MENU PASSWD
>   kernel mboot.c32
>   append xen-3.0.3-1-i386-pae.gz --- vmlinuz-2.6.18-6-xen-vserver-686 root=/dev/sda1 ro console=tty0 --- initrd-pxe.2.6.18-6-xen-vserver-686.img
>   TEXT HELP
>   Run Xen 3.0 in each DRBL Client
>   ENDTEXT
> EOF
- Use dcs to switch PXE menu
drbl-xen-srv:~# /opt/drbl/sbin/dcs more switch-pxe-menu
- Use Thin Client VMWare Image to test DRBL


Enable Xend in default rcX.d
- You can run /etc/init.d/xend start manually to start xen service for each DRBL clients via drbl-doit command.
root@drbl-xeb-srv:~# /opt/drbl/bin/drbl-doit /etc/init.d/xend start
- You can check the status of xend by running xm list
root@drbl-xeb-srv:~# /opt/drbl/bin/drbl-doit /usr/sbin/xm list
- To save your time, we recommand you to add xend to default rcX.d by running update-rc.d xend defaults
root@drbl-xeb-srv:~# /opt/drbl/bin/drbl-doit /usr/sbin/update-rc.d xend defaults
Know Issue of DRBL () with Xen
- Issue 1: Xen DormU Client will need /boot which in only on DRBL Server
- Step 1: patch /opt/drbl/sbin/drbl-nfs-exports
-
/opt/drbl/sbin/drbl-nfs-exports
old new 135 135 for subnet in $subnet_list; do 136 136 cat <<EOF >> $nfs_exports 137 137 $drbl_common_root $subnet.*($EXPORTS_NFS_RO_NRS_OPT) 138 /boot $subnet.*($EXPORTS_NFS_RO_NRS_OPT) 138 139 /usr $subnet.*($EXPORTS_NFS_RO_NRS_OPT) 139 140 /opt $subnet.*($EXPORTS_NFS_RO_NRS_OPT) 140 141 /home $subnet.*($EXPORTS_NFS_RW_NRS_OPT) … … 169 170 for ip in `get-client-ip-list`; do 170 171 cat <<EOF >> $nfs_exports 171 172 $drbl_common_root $ip($EXPORTS_NFS_RO_NRS_OPT) 173 /boot $ip($EXPORTS_NFS_RO_NRS_OPT) 172 174 /usr $ip($EXPORTS_NFS_RO_NRS_OPT) 173 175 /opt $ip($EXPORTS_NFS_RO_NRS_OPT) 174 176 /home $ip($EXPORTS_NFS_RW_NRS_OPT)
-
- step 2: patch /opt/drbl/sbin/drbl-gen-client-files
-
/opt/drbl/sbin/drbl-gen-client-files
old new 214 214 $nfsserver:$drblroot/$ip/etc /etc nfs $FSTAB_NFS_RW_OPT 215 215 $nfsserver:$drblroot/$ip/var /var nfs $FSTAB_NFS_RW_OPT 216 216 $nfsserver:$drblroot/$ip/root /root nfs $FSTAB_NFS_RW_OPT 217 $nfsserver:/boot /tmp/boot nfs $FSTAB_NFS_RO_OPT 217 218 $nfsserver:/usr /usr nfs $FSTAB_NFS_RO_OPT 218 219 $nfsserver:/opt /opt nfs $FSTAB_NFS_RO_OPT 219 220 $nfsserver:/home /home nfs $FSTAB_NFS_RW_OPT
-
- Step 3: creat a shell script to mount /boot for each node.
root@drbl-xeb-srv:~# vi mount_boot
root@drbl-xeb-srv:~# /opt/drbl/sbin/drbl-cp-host mount_boot /etc/init.d/
root@drbl-xeb-srv:~# /opt/drbl/sbin/drbl-client-service mount_boot on
- Here is mount_boot
#! /bin/sh set -e # /etc/init.d/mount_boot: mount /boot for DRBL Client which is Xen enabled. export PATH="${PATH:+$PATH:}/usr/sbin:/sbin" case "$1" in start) mkdir -p /tmp/boot echo -n "mounting /boot:" mount /boot echo "[OK]" ;; stop) echo -n "unmounting /boot:" umount /boot echo "[OK]" ;; *) echo "Usage: /etc/init.d/ssh {start|stop}" exit 1 esac exit 0 - [Note 1] The "/boot" problem had been fixed by DRBL version 1.9.1-5
- [Note 2] You can also modify "/opt/drbl/conf/client-append-fstab" for adding new mount point for each nodes. You can check the offical document for more detail.
If all the clients have their local harddisk, and the partition is formated (For example, /dev/hda1, its filesystem is ext3), then if you want the client to mount /dev/hda1 as /localwork when booting. Therefore you can edit /opt/drbl/conf/client-append-fstab, and its syntax is just like /etc/fstab. In this example, you can make /opt/drbl/conf/client-append-fstab like this:
/dev/hda1 /localwork ext3 defaults 0 0
(PS: You do not have to create the directory /tftpboot/node_root/localwork in DRBL server manually, later drblpush will do that for you)
- Here is mount_boot
- Step 4: run /opt/drbl/sbin/dcs -> re-deploy or /opt/drbl/sbin/drblpush -c /etc/drbl/drblpush.conf to replace current /etc/exports.
- Step 1: patch /opt/drbl/sbin/drbl-nfs-exports
Create Xen DormU configure files
- Use xen-create-image command to create new DormU image
root@drbl-xen-srv:~# ssh 192.168.0.2
root@pc002:~# xen-create-image -dir /home/xen --dist etch --debootstrap --fs reiserfs --accounts --kernel /boot/vmlinuz-2.6.18-6-xen-vserver-686 --initrd /boot/initrd.img-2.6.18-6-xen-vserver-686 --hostname etch1 --dhcp --mirror http://free.nchc.org.tw/debian
root@pc002:~# xm create etch1.cfg
root@pc002:~# xm list
Reference
- Syslinux Wiki
- Xen PXE Boot Howto
- Bootloader support for Xen
- If you are using debian, beware of bug #391152
- A Time Machine and File Server with RAID, Samba and Xen (PDF)
Attachments (7)
- drbl_xen_vmx.jpg (84.3 KB) - added by jazz 18 years ago.
- xen_4gb_seg_fixup.png (22.4 KB) - added by jazz 18 years ago.
- xen_grub.png (11.2 KB) - added by jazz 18 years ago.
- drbl_xen_client_vmx.jpg (85.4 KB) - added by jazz 18 years ago.
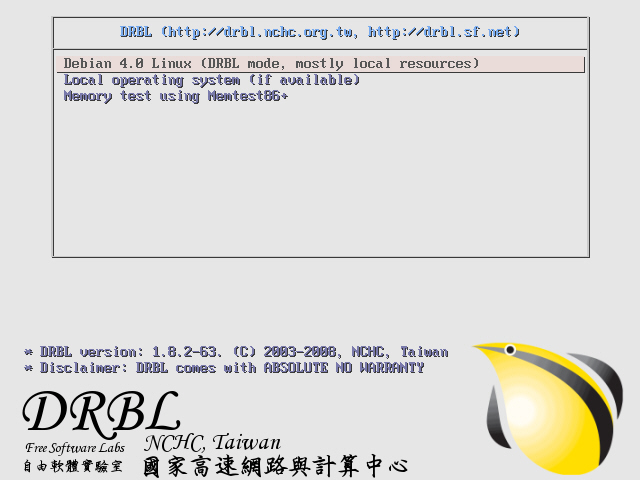
- drbl_xen_client_boot.jpg (98.7 KB) - added by jazz 18 years ago.
- drbl_xen_client_boot_2.jpg (95.4 KB) - added by jazz 18 years ago.
- drbl_xen_client_boot_3.jpg (171.1 KB) - added by jazz 18 years ago.
Download all attachments as: .zip