
| Version 34 (modified by jazz, 18 years ago) (diff) |
|---|
Massive Deployment of Xen enabled Virtual Cluster using Diskless Remote Boot Linux
Test Environment
- VMWare Server 1.0.3
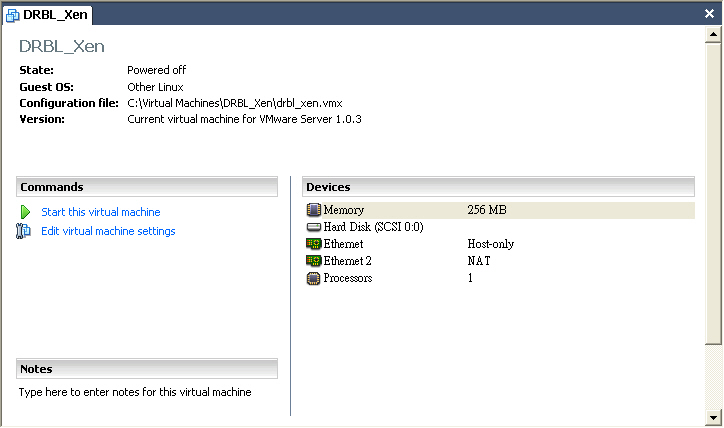
- VMWare Image debian 4.0r1 as DRBL Server
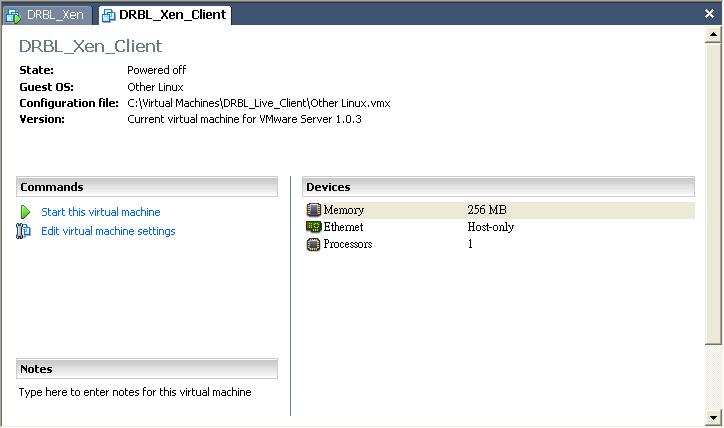
- VMWare Image without disk as DRBL Client


Pre-installation
- First, install Xen Hypervisor and Xen enabled Linux Kernel and then reboot
root@drbl-xen-srv:~# uname -a
root@drbl-xen-srv:~# mv /lib/tls /lib/tls.disabled
root@drbl-xen-srv:~# echo "loop max_loop=255" >> /etc/modules
Linux drbl-xen-srv 2.6.18-6-686 #1 SMP Sat May 24 10:24:42 UTC 2008 i686 GNU/Linux
root@drbl-xen-srv:~# apt-get install xen-hypervisor-3.0.3-1-i386-pae linux-image-2.6.18-6-xen-vserver-686 xen-tools libc6-xen bridge-utils
root@drbl-xen-srv:~# update-grub
root@drbl-xen-srv:~# reboot
- Note1: If you did not install libc6-xen, "4gb seg fixup" error message will keep showing up while booting.

- Note2: amd64 architecture does not have libc6-xen package (i386 only)
- Note3: disable tls for libc6-xen
root@drbl-xeb-srv:/lib# dpkg -S /lib/tls
libc6-xen, libc6: /lib/tls
- Note4: Xen will use loop device for creating new DormU machine, so we load loop kernel module while booting.
- Choose Xen to boot at GRUB menu


Install and Configure DRBL
- Download GPG-KEY-DRBL and add GPG key via apt-key
root@drbl-xen-srv:~# wget http://drbl.nchc.org.tw/GPG-KEY-DRBL
root@drbl-xen-srv:~# apt-key add GPG-KEY-DRBL
- Add DRBL repository URL to /etc/apt/sources.list.d/ then install drbl package
root@drbl-xen-srv:~# echo "deb http://free.nchc.org.tw/drbl-core drbl stable" > /etc/apt/sources.list.d/drbl-sources.list
root@drbl-xen-srv:~# apt-get update
root@drbl-xen-srv:~# apt-get install drbl
- Use drblsrv command to setup DRBL server. Here we choose linux-image-2.6.18-6-486 as default DRBL PXE kernel image
root@drbl-xen-srv:~# /opt/drbl/sbin/drblsrv -i
[....skip....]
Install kernel for clients... ...
In ayo repository, searching the latest kernel ...
*****************************************************.
Now run: /opt/drbl/sbin/drblsrv-offline -c -d -a -l en_US -k /var/cache/apt/archives/linux-image-2.6.18-6-486_2.6.18.dfsg.1-18etch5_i386.deb "" ""
Kernel package /var/cache/apt/archives/linux-image-2.6.18-6-486_2.6.18.dfsg.1-18etch5_i386.deb is used for client...
*****************************************************.
[....skip....]
- Use drblpush command to deploy DRBL Client Image
root@drbl-xen-srv:~# /opt/drbl/sbin/drblpush -i
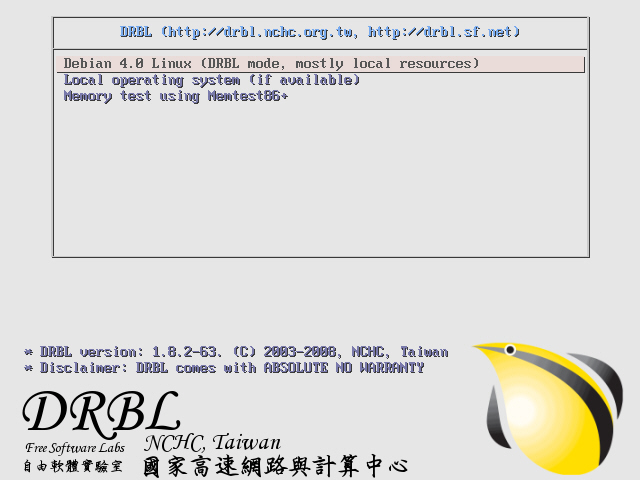
- Use Thin Client VMWare Image to test DRBL

Configure PXELinux for Xen Network Booting
- To load Xen-based kernels you have to use the SYSLINUX multiboot module mboot.c32. So we copy mboot.c32 and Xen hypervisor to TFTP root directory of DRBL.
root@drbl-xen-srv:~# dpkg -S mboot.c32
syslinux: /usr/lib/syslinux/mboot.c32
root@drbl-xen-srv:~# cp /usr/lib/syslinux/mboot.c32 /tftpboot/nbi_img/.
root@drbl-xen-srv:~# cp /boot/xen-3.0.3-1-i386-pae.gz /tftpboot/nbi_img/.
- Use drblsrv-offline command to generate initial ramdisk of xen-based kernel which is needed for PXE network booting. You should find initrd-pxe.2.6.18-6-xen-vserver-686.img and vmlinuz-2.6.18-6-xen-vserver-686 in /tftpboot/nbi_img/ folder.
root@drbl-xen-srv:~# /opt/drbl/sbin/drblsrv-offline -s `uname -r`
root@drbl-xen-srv:~# find /tftpboot/nbi_img/ -name "*-xen*"
/tftpboot/nbi_img/initrd-pxe.2.6.18-6-xen-vserver-686.img
/tftpboot/nbi_img/vmlinuz-2.6.18-6-xen-vserver-686
- Note: initrd-pxe.2.6.18-6-xen-vserver-686.img is different from /boot/initrd.img-2.6.18-6-xen-vserver-686. In initrd-pxe.2.6.18-6-xen-vserver-686.img, there are NFS mounting scripts which is needed for each DRBL client.
- Since Xen-based kernel can not boot with Xen hypervisor, we have to switch vmlinuz-pxe and initrd-pxe.img back to normal linux kernl.
root@drbl-xen-srv:~# /opt/drbl/sbin/drblsrv-offline -c -d -a -l en_US -k /var/cache/apt/archives/linux-image-2.6.18-6-486_2.6.18.dfsg.1-18etch5_i386.deb
- Note: You can simply remove and recreate the symbolic links named by vmlinuz-pxe and initrd-pxe.img in /tftpboot/nbi_img
root@drbl-xen-srv:~# cd /tftpboot/nbi_img
root@drbl-xen-srv:/tftpboot/nbi_img# rm initrd-pxe.img vmlinuz-pxe
root@drbl-xen-srv:/tftpboot/nbi_img# ln -s initrd-pxe.2.6.18-6-486.img initrd-pxe.img
root@drbl-xen-srv:/tftpboot/nbi_img# ln -s vmlinuz-2.6.18-6-486 vmlinuz-pxe
- Note: You can simply remove and recreate the symbolic links named by vmlinuz-pxe and initrd-pxe.img in /tftpboot/nbi_img
- Add a new Xen option to pxelinux.cfg
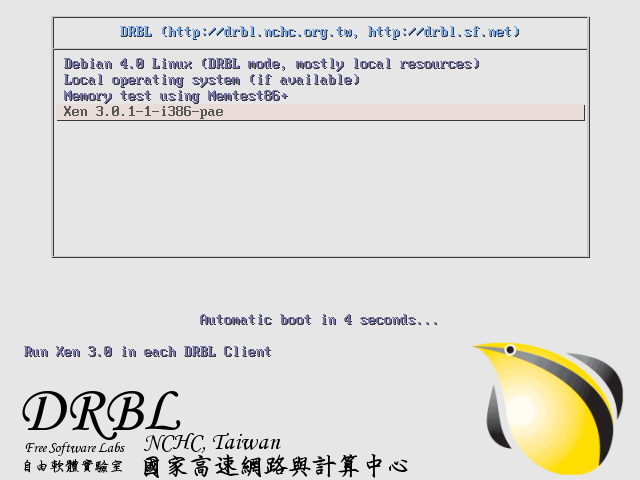
root@drbl-xen-srv:~# cat << EOF >> /tftpboot/nbi_img/pxelinux.cfg/default
> label xen cluster
>   MENU DEFAULT
>   # MENU HIDE
>   MENU LABEL Xen 3.0.1-1-i386-pae
>   # MENU PASSWD
>   kernel mboot.c32
>   append xen-3.0.3-1-i386-pae.gz --- vmlinuz-2.6.18-6-xen-vserver-686 root=/dev/sda1 ro console=tty0 --- initrd-pxe.2.6.18-6-xen-vserver-686.img
>   TEXT HELP
>   Run Xen 3.0 in each DRBL Client
>   ENDTEXT
> EOF
- Use dcs to switch PXE menu
drbl-xen-srv:~# /opt/drbl/sbin/dcs more switch-pxe-menu
- Use Thin Client VMWare Image to test DRBL


Enable Xend in default rcX.d
- You can run /etc/init.d/xend start manually to start xen service for each DRBL clients via drbl-doit command.
root@drbl-xeb-srv:~# /opt/drbl/bin/drbl-doit /etc/init.d/xend start
- You can check the status of xend by running xm list
root@drbl-xeb-srv:~# /opt/drbl/bin/drbl-doit /usr/sbin/xm list
- To save your time, we recommand you to add xend to default rcX.d by running update-rc.d xend defaults
root@drbl-xeb-srv:~# /opt/drbl/bin/drbl-doit /usr/sbin/update-rc.d xend defaults
Know Issue of DRBL () with Xen
- Issue 1: Xen DormU Client will need /boot which in only on DRBL Server
- Step 1: patch /opt/drbl/sbin/drbl-nfs-exports
-
/opt/drbl/sbin/drbl-nfs-exports
old new 135 135 for subnet in $subnet_list; do 136 136 cat <<EOF >> $nfs_exports 137 137 $drbl_common_root $subnet.*($EXPORTS_NFS_RO_NRS_OPT) 138 /root $subnet.*($EXPORTS_NFS_RO_NRS_OPT) 138 139 /usr $subnet.*($EXPORTS_NFS_RO_NRS_OPT) 139 140 /opt $subnet.*($EXPORTS_NFS_RO_NRS_OPT) 140 141 /home $subnet.*($EXPORTS_NFS_RW_NRS_OPT) … … 169 170 for ip in `get-client-ip-list`; do 170 171 cat <<EOF >> $nfs_exports 171 172 $drbl_common_root $ip($EXPORTS_NFS_RO_NRS_OPT) 173 /root $ip($EXPORTS_NFS_RO_NRS_OPT) 172 174 /usr $ip($EXPORTS_NFS_RO_NRS_OPT) 173 175 /opt $ip($EXPORTS_NFS_RO_NRS_OPT) 174 176 /home $ip($EXPORTS_NFS_RW_NRS_OPT)
-
- step 2: patch /opt/drbl/sbin/drbl-gen-client-files
-
/opt/drbl/sbin/drbl-gen-client-files
old new 214 214 $nfsserver:$drblroot/$ip/etc /etc nfs $FSTAB_NFS_RW_OPT 215 215 $nfsserver:$drblroot/$ip/var /var nfs $FSTAB_NFS_RW_OPT 216 216 $nfsserver:$drblroot/$ip/root /root nfs $FSTAB_NFS_RW_OPT 217 $nfsserver:/boot /tmp/boot nfs $FSTAB_NFS_RO_OPT 217 218 $nfsserver:/usr /usr nfs $FSTAB_NFS_RO_OPT 218 219 $nfsserver:/opt /opt nfs $FSTAB_NFS_RO_OPT 219 220 $nfsserver:/home /home nfs $FSTAB_NFS_RW_OPT
-
- Step 3: creat a shell script to mount /boot for each node.
root@drbl-xeb-srv:~# vi mount_boot
root@drbl-xeb-srv:~# /opt/drbl/sbin/drbl-cp-host mount_boot /etc/init.d/
root@drbl-xeb-srv:~# /opt/drbl/sbin/drbl-client-service mount_boot on
- Here is mount_boot
#! /bin/sh
set -e

# /etc/init.d/mount_boot: mount /boot for DRBL Client which is Xen enabled.

export PATH="${PATH:+$PATH:}/usr/sbin:/sbin"

case "$1" in
  start)
        mkdir -p /tmp/boot
        echo -n "mounting /boot:"
        mount /boot
        echo "[OK]"
        ;;
  stop)
        echo -n "unmounting /boot:"
        umount /boot
        echo "[OK]"
        ;;

  *)
        echo "Usage: /etc/init.d/ssh {start|stop}"
        exit 1
esac

exit 0
- Here is mount_boot
- Step 4: run /opt/drbl/sbin/dcs -> re-deploy or /opt/drbl/sbin/drblpush -c /etc/drbl/drblpush.conf to replace current /etc/exports.
- Step 1: patch /opt/drbl/sbin/drbl-nfs-exports
Create Xen DormU configure files
- Use xen-create-image command to create new DormU image
root@drbl-xen-srv:~# ssh 192.168.0.2
root@pc002:~# xen-create-image -dir /home/xen --dist etch --debootstrap --fs reiserfs --accounts --kernel /boot/vmlinuz-2.6.18-6-xen-vserver-686 --initrd /boot/initrd.img-2.6.18-6-xen-vserver-686 --hostname etch1 --dhcp --mirror http://free.nchc.org.tw/debian
root@pc002:~# xm create etch1.cfg
root@pc002:~# xm list
Reference
- Syslinux Wiki
- Xen PXE Boot Howto
- Bootloader support for Xen
- If you are using debian, beware of bug #391152
- A Time Machine and File Server with RAID, Samba and Xen (PDF)
Attachments (7)
- drbl_xen_vmx.jpg (84.3 KB) - added by jazz 18 years ago.
- xen_4gb_seg_fixup.png (22.4 KB) - added by jazz 18 years ago.
- xen_grub.png (11.2 KB) - added by jazz 18 years ago.
- drbl_xen_client_vmx.jpg (85.4 KB) - added by jazz 18 years ago.
- drbl_xen_client_boot.jpg (98.7 KB) - added by jazz 18 years ago.
- drbl_xen_client_boot_2.jpg (95.4 KB) - added by jazz 18 years ago.
- drbl_xen_client_boot_3.jpg (171.1 KB) - added by jazz 18 years ago.
Download all attachments as: .zip