| Version 32 (modified by rock, 16 years ago) (diff) |
|---|
DRBL deploy to dom0 & domU
【0.前言】
- 已建置好 DRBL-Xen 環境 (可參考此篇)
- DRBL Client 需有兩張網卡 (一張為DRBL環境,另一張為 domU 來bridge)
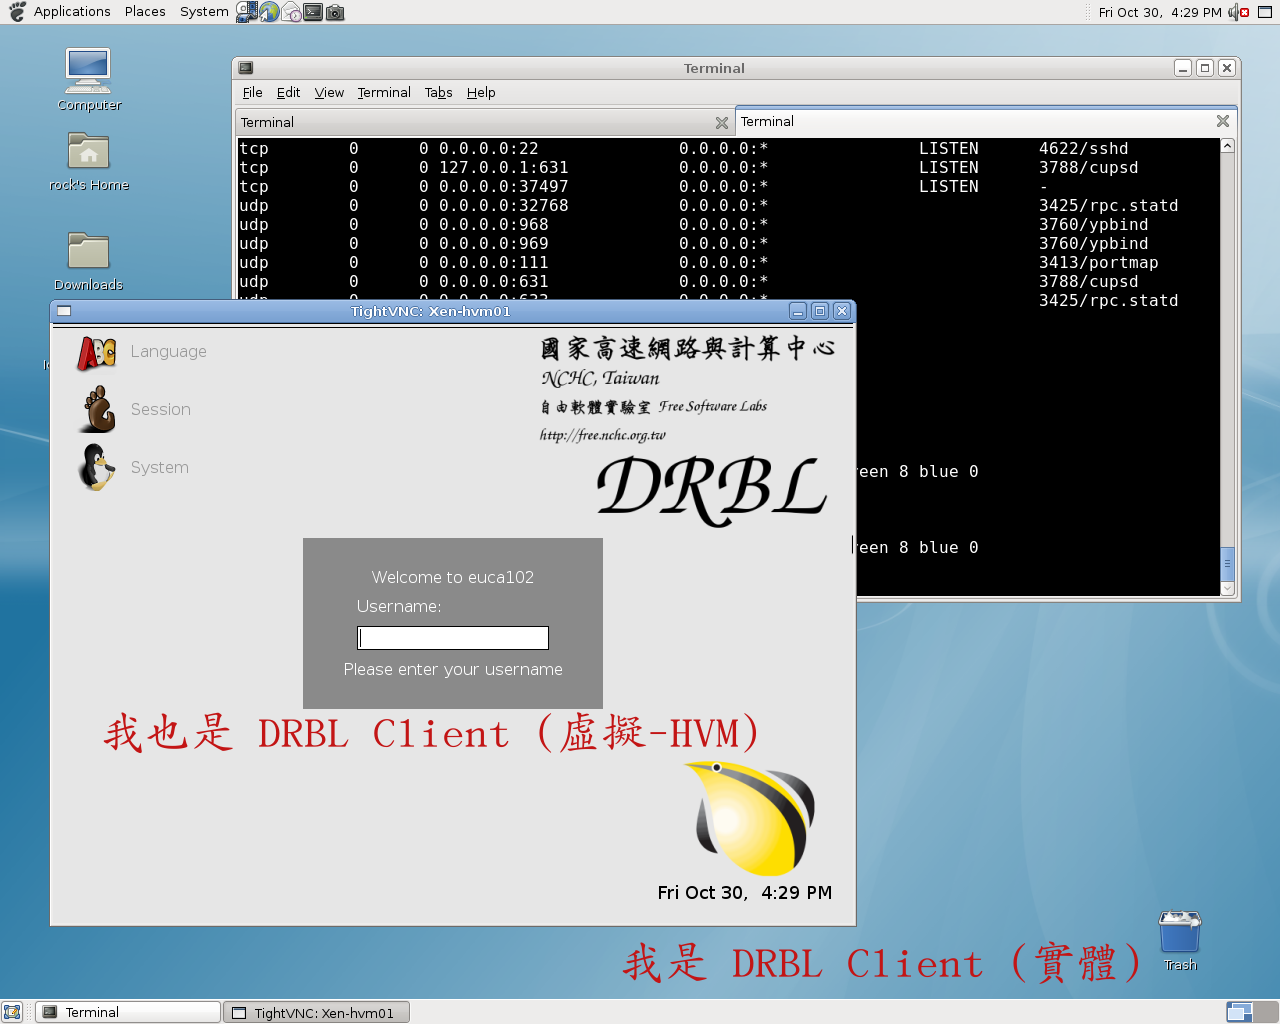
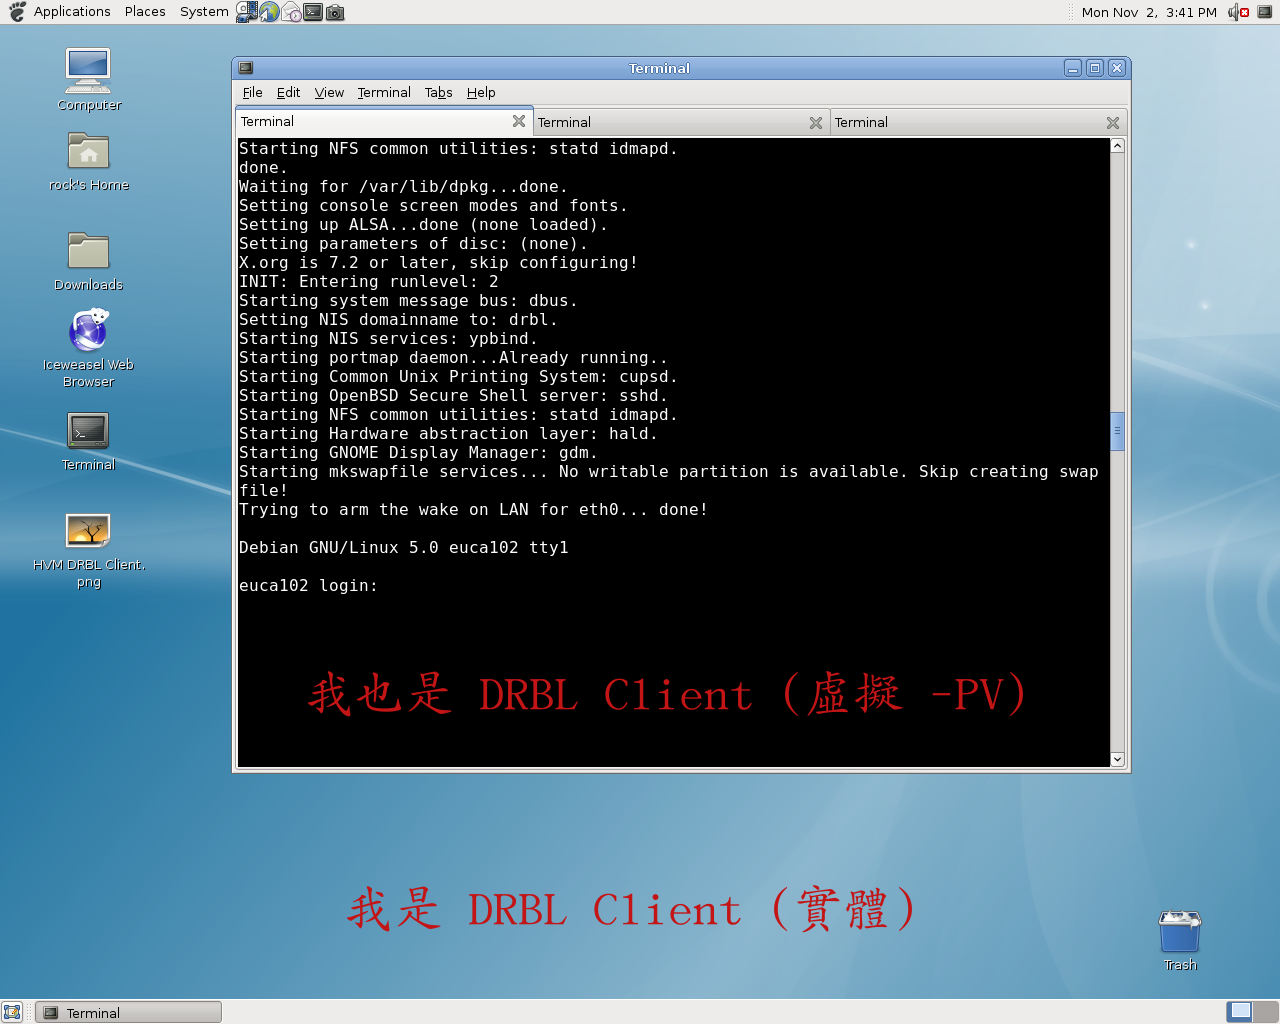
- 本測試以 DRBL 來佈署實體的 DRBL Client,同時利用 DRBL 的網路開機機制,讓支援 網路開機的 HVM domU 和 PV domU 也能成為 DRBL Client。
- 優點 - DRBL 實體的 Client 有限,但虛擬的 Client 則可根據使用者需求增加或刪除
- 缺點 - 虛擬 Client 效能沒有實體 Client 強,此平台只適用於一般多用途 (不適用於特定用途)
【1.DRBL-Xen 環境配置】
- 將 Server 的 Xen Image 複製到 DRBL Client 的路徑
$ sudo su
$ cp /boot/*xen* /tftpboot/nbi_img
$ mv /tftpboot/node_root/boot /tftpboot/node_root/boot.old && mkdir /tftpboot/node_root/boot
$ cp /boot/* /tftpboot/node_root/boot/
- DRBL Xen Client 的網路設定
$ vim /etc/xen/xend-config.sxp
(network-script 'network-route netdev=eth1')
(vif-script     vif-route)

$ sudo vim /etc/netwrok/interfaces
allow-hotplug eth1
iface eth1 inet static
        address 192.168.100.X
        netmask 255.255.255.0
【2.HVM DRBL Client】
- 只需修改設定檔即可,可參考以下設定檔
import os, re
arch = os.uname()[4]
if re.search('64', arch):
    arch_libdir = 'lib64'
else:
    arch_libdir = 'lib'
# Base
kernel='/usr/lib/xen/boot/hvmloader'
builder='hvm'
memory='512'
name='hvm01'
device_model='/usr/lib/xen/bin/qemu-dm'
boot='n'
vif=['type=ioemu,bridge=eth1,mac=00:00:aa:bb:44:ae']

# Graphical
vnc=1
sdl=0

# Console
vncconsole=1

# Other
acpi = 1
apic = 1
serial='pty'

# USB Mouse point
usbdevice='tablet'

# VNC
vncviewer=1
vncpasswd=""
vnclisten='0.0.0.0'
【3.PV DRBL Client】
- 要讓 DRBL Client 上的 VM 也作為 DRBL Client (有兩種方式)
- 讓 domU 開機時可以透過 PXE 網路開機 (有三種作法)
- pypxeboot
- [△] 需 patch udhcp (但目前官方只支援 32bit 版本的 patch,需自行 patch 到 64bit 版本)
- PyGrub
- [X] 不可行 (原開發者文件中指出 -> 不支援網路開機)
- PvGrub
- [O] 目前測試成功,但是有些地方需要人工操作,無法完全自動化 (持續測試中)
- if you see "grubdom>", this maybe grub can't find its config file. Check your harddisk partition number to make sure that is correct or check the position of grub config file.
- pypxeboot
- domU 不使用網路開機,直接使用 DRBL initrd-pxe 的特性
- [O] 測試成功,只需再設定檔修改成 DRBL 的 Kernel 和 initrd-pxe 即可
- 因 DRBL 的特性是在 initrd 階段才去掛載 NFS 作為檔案系統
- DRBL Client 已經有了自己的檔案系統,可以讓 domU 不需再透過網路去要 Kernel 和 initrd-pxe (可將 Kernel 和 initrd-pxe 複製到 /home/domains)
- 只需再 domU 設定檔內指定Kernel 和 initrd-pxe即可
- [O] 測試成功,只需再設定檔修改成 DRBL 的 Kernel 和 initrd-pxe 即可
- 讓 domU 開機時可以透過 PXE 網路開機 (有三種作法)
- 可參考此設定檔
kernel      = '/home/domains/vmlinuz-2.6.22.9'
ramdisk     = '/home/domains/initrd-pxe.2.6.22.9.img'
memory      = '512'
name        = 'vm01'

# root        = '/dev/sda1'
# disk        = ['phy:/dev/sda1,sda,w']
# (不需使用 disk,讓 domU 為 diskless)

dhcp        = 'dhcp'
vif         = [ 'mac=00:16:3E:BE:53:2C']

on_poweroff = 'destroy'
on_reboot   = 'restart'
on_crash    = 'restart'

vfb = [ 'type=vnc,vnclisten=0.0.0.0,vncunused=1' ]
# (可透過 vncviewer 登入)
【問題】
未解決
已解決
- Client 開機時,若有三個 eth,會依序使用 eth1 eth2 eth0 透過 udhcpc 來跟 DRBL Server 要 IP,是否有方法來指定 eth0 要即可?
- Client開機時, udhcpc 會根據 XEN 的 netloop 的數量抓到多餘的 veth 和 vif 裝置,解決方法可在 kernel command 加上 netloop.nloopbacks=0 或將其編譯成 module
- 回報給老大,老大已更新 linuxrc-or-init (/usr/lib/mkpxeinitrd-net/initrd-skel) 在新的 unstable DRBL 版本,預設只會使用 eth0 來抓 IP
- Client 啟動 xend 時,無法 bridge eth0 (Xend 的服務正常,只是沒有 bridge 裝置)
$ xend restart
ifdown: interface eth0 not configured
SIOCSIFNAME: Device or resource busy
- 推測: DRBL 的邏輯是 須先啟動網路裝置 (在 initrd 階段啟動) 來 mount NFS 作為 rootfs,
但 Xend 啟動時,會先 ifdown eth0,在做一些 brctl 的相關動作後載啟動 eth0 - 作法一(x):增加 eth0 內容到 /etc/network/interface 也無法成功 bridge
- 作法二(x):自行手動先 ifup eth0 起來,導致系統整個停住 (因網路皆停止、rootfs 無法 mount,終端機也無法控制)
- 作法三(x):改用別名
$ xend restart
Error: either "local" is duplicate, or "eth0" is a garbage.
- 作法四(?):修改 /etc/xen/script/network-bridge
- 作法五(O):官方建議若是使用 NFS roots 可改用 netwrok-route,只是缺點無法抓到 DHCP IP
- domU IP 必須設定為 static,DRBL Server 必須 iptables -t nat -A POSTROUTING -s 192.168.1.0/24 -j MASQUERADE
- 作法六(O):多插一張網卡 XD
- 推測: DRBL 的邏輯是 須先啟動網路裝置 (在 initrd 階段啟動) 來 mount NFS 作為 rootfs,
Attachments (4)
- PV DRBL CLient.png (291.4 KB) - added by rock 16 years ago.
- HVM DRBL Client.png (275.8 KB) - added by rock 16 years ago.
- pv-grub01.png (94.5 KB) - added by rock 16 years ago.
- pv-grub03.png (34.6 KB) - added by rock 16 years ago.
Download all attachments as: .zip


