
| Version 7 (modified by adherelinux, 16 years ago) (diff) |
|---|
=Ubuntu下安裝CUDA (Tesla C1060)=
Tesla並沒有顯示功能,所以需要另一張顯示卡。這裏用的是nvidia GeForce? 9800GT 支援CUDA的顯示卡。
安裝順序:
- CUDA驅動程式2. CUDA工具套件3. CUDA軟體開發工具(SDK)程式碼範例除了程式碼範例外,其他全詳細步驟如下:
- 安裝CUDA支援的Ubuntu 版本。目前支援到Ubuntu 9.04版。
- 安裝新的nvidia驅動程式
先檢查顯示卡的驅動程式。 檢查檔案 /etc/X11/xorg.conf: 進入終端機 (Terminal)後, $sudo less /etc/X11/xorg.conf 如果尚未安裝任何驅動程式, 可能會看到
# xorg.conf (X.Org X Window System server configuration file) # …… # ……
. . .
# sudo dpkg-reconfigure -phigh xserver-xorg
Section "Device"
Identifier "Configured Video Device"
Endsection Section "Monitor"
Identifier "Configured Monitor"
Endsection Section "Screen"
Identifier "Default Screen" Monitor "Configured Monitor" Device "Configured Video Device"
Endsection
如果已經安裝nvidia驅動程式,但不是自己編譯的,必須要移除$sudo apt-get remove nvidia-*
3.安裝編譯所需要的核心及相關套件
$sudo apt-get install build-essential linux-source linux-headers-uname -r
$sudo apt-get install xserver-xorg-dev libglut3-dev libglu1-mesa-dev libxi-dev libxmu-dev libc6-dev
如果尚未安裝 gcc 與 g++
$sudo apt-get install gcc-4.3 g++-4.3
4.下載CUDA安裝所需的所有檔案
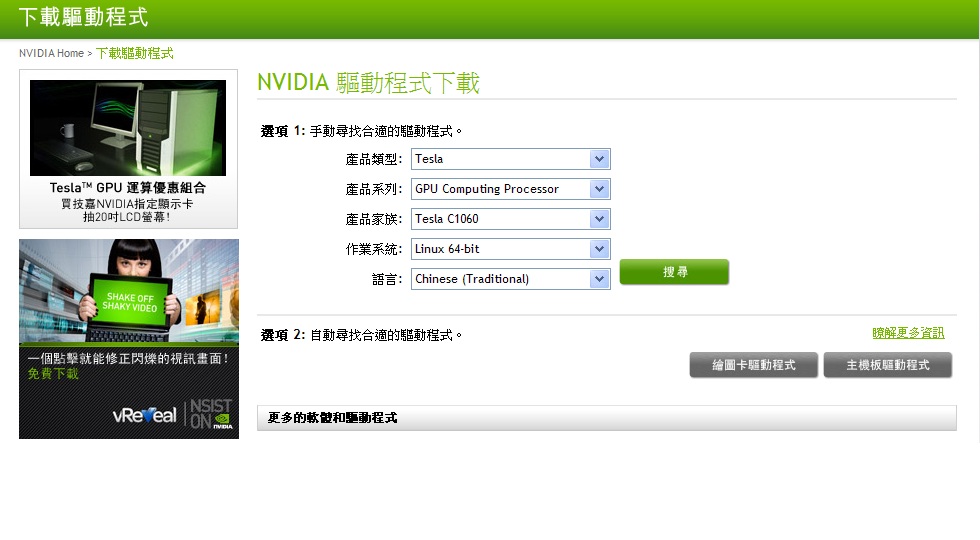
(1)下載適合的驅動程式
http://www.nvidia.com.tw/Download/index.aspx?lang=tw

以手動尋找。
產品類型: 點選 Tesla
產品系列: 點選 GPU Computing Processor
產品家族: 點選 Tesla C1060
作業系統: 依Linux 系統32位元或64位元作選擇
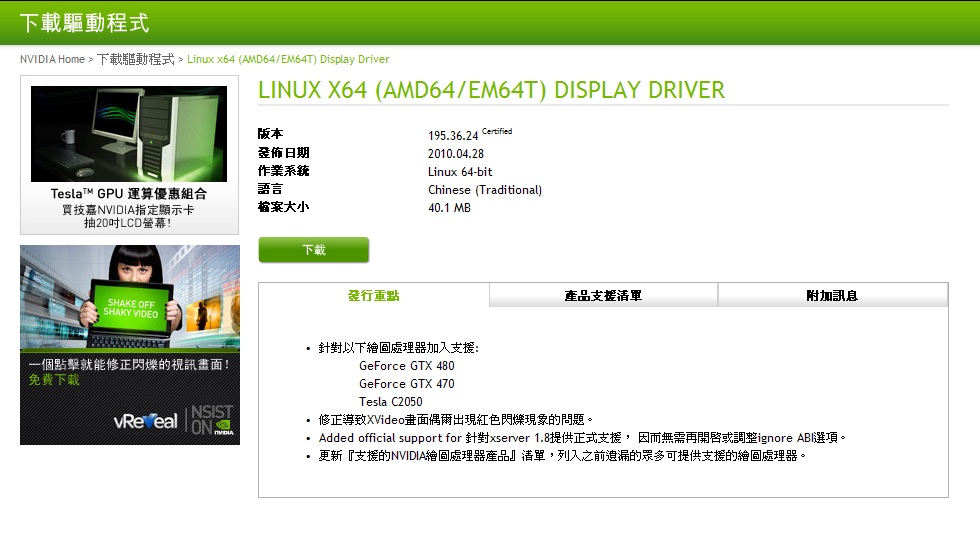
點選搜尋後,會出現以下畫面:

點選下載NVIDIA-Linux-x86_64-195.36.24-pkg2.run
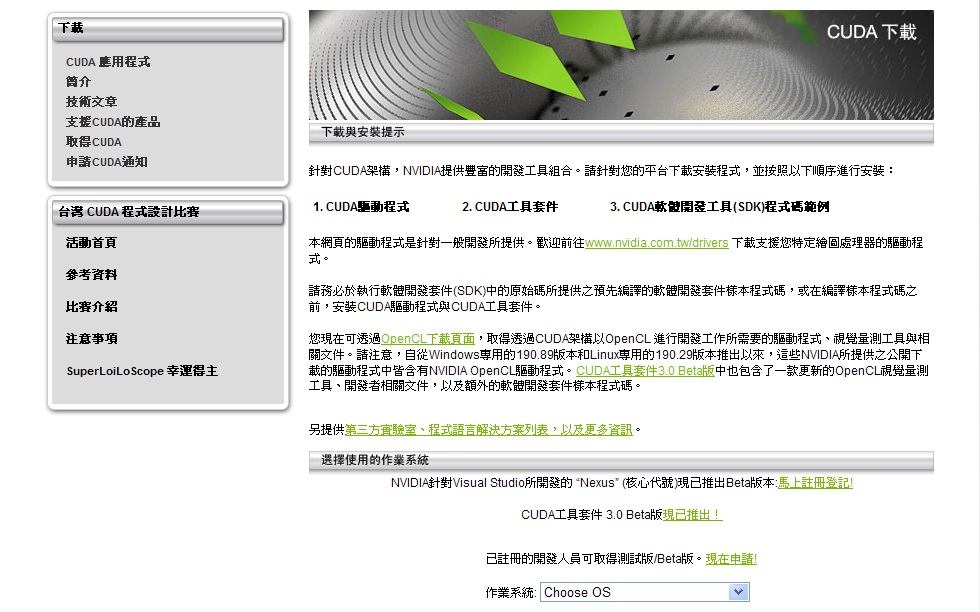
(2) 下載 CUDA Toolkit 及CUDA SDK
http://www.nvidia.com.tw/object/cuda_get_tw.html

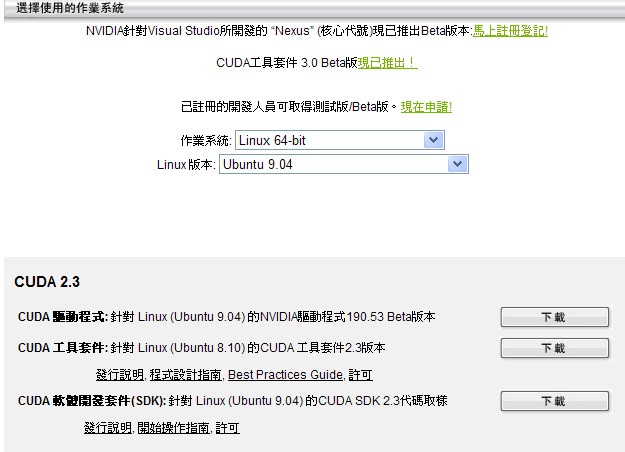
如果要安裝最新的套件,點選 “CUDA 工具套件3.0Beta版”。這個範例安裝的是2.3版的工具套件。點選適合的作業系統

比較驅動程式的版本,選用較新版。這裏的版本比先前下載的還舊,所以只要下載工具套件和軟體開發套件。
下載後,可看到檔名是
cudatoolkit_2.3_linux_64_ubuntu9.04.run
cudasdk_2.3_linux.run
5.關掉圖形介面以安裝nvidia顯示卡驅動程式
按 Crl+Alt+F1進入終端機登入
$sudo /etc/init.d/gdm stop
6.假設所有的檔案都在目前所在目錄下
(1) $sudo sh ./NVIDIA-Linux-x86_64-195.36.24-pkg2.run
會進入nvidia授權頁,用Tab鍵選擇 “Accept” 。
(2)接著會看到以下畫面
There appears to already be a driver installed on your system (version: xxx.xx.xx). As part of installing this driver (version: xxx.xx.xx), the existing driver will be uninstalled. Are you sure you want to continue?
選擇 “Yes”。
(3)
Install NVIDIA's 32-bit compatibility OpenGL libraries?
這裏的版本是64位元的,選擇 “No”。
(4)
Would you like to run the nvidia-xconfig utility to automatically update your X configuration file so that the NVIDIA X driver will be used when you restart X? Any re-existing X configuration file will be backed up.
選擇 “Yes”。
(5) 完成後,在終端機模式下重新開機
$sudo reboot
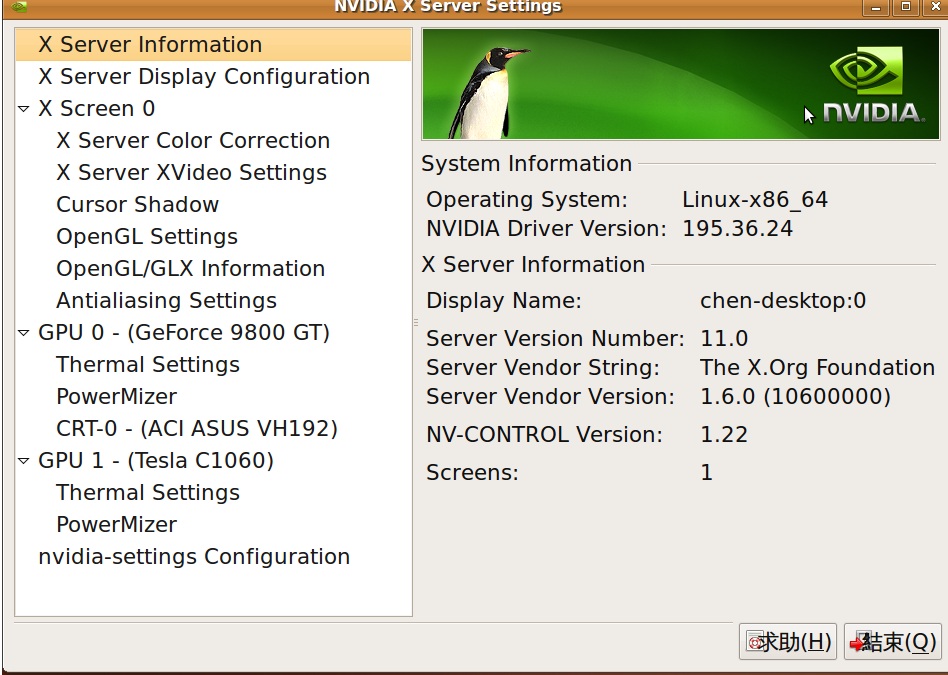
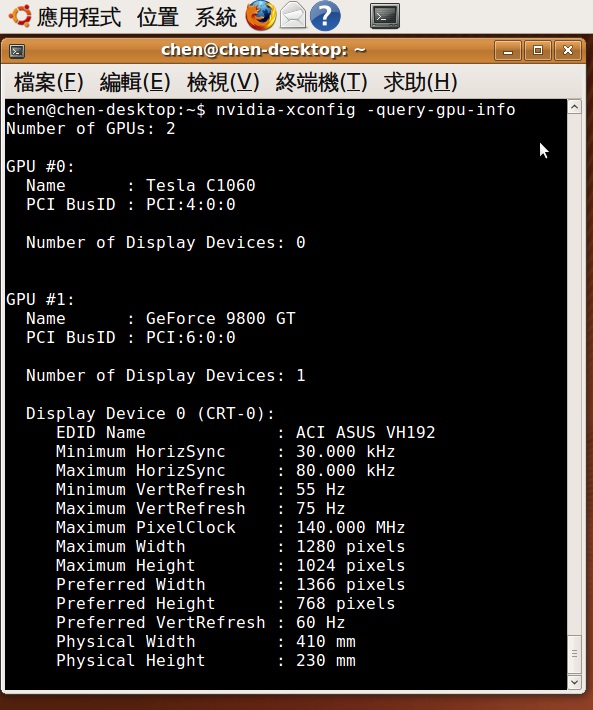
7.檢查是否安裝成功
點選 system > preferences > NVIDIA X-Server Settings
如果看到Tesla 的資訊,代表安裝成功。
Attachments (6)
-
NVIDIAIP.jpg
(105.8 KB) -
added by adherelinux 16 years ago.
NVIDIA IP
-
Nvidia_product.jpg
(124.8 KB) -
added by adherelinux 16 years ago.
Nvidia_product
-
toolkit.jpg
(171.8 KB) -
added by adherelinux 16 years ago.
toolkit
-
cuda2.3.jpg
(68.8 KB) -
added by adherelinux 16 years ago.
cuda2.3
-
nvidia_xserver.jpg
(189.5 KB) -
added by adherelinux 16 years ago.
nvidia_xserver
-
query_gpu.jpg
(146.9 KB) -
added by adherelinux 16 years ago.
query_gpu
Download all attachments as: .zip